Groups is located under Management-->Groups (see figure 17.1).
Groups are used to organize data and control user access to items such as Projects,
Activities, Pay Types, Bill Types, Time Entry Screens, etc. Groups may be thought
of as sets that contain one or more users and projects, activities, etc. that those
users can access. Each user can be assigned to one or more Groups, and each
item such as a Project, Activity, Pay Type, etc. can be assigned to one or more
Groups. Groups are the ultimate access control devices in the system and as
such require particular attention.
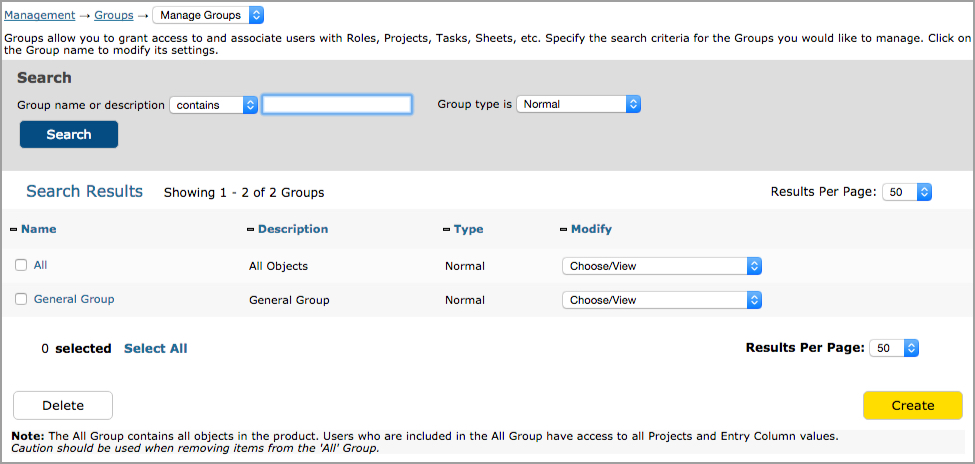
Figure 17.1.Groups main page
The All Group
In addition to Groups that the administrator creates to establish the order
within an organization, the system contains one default Group that is consistent
across all installations - the All Group. Every installation of
Journyx
contains
a Group named 'All'. This Group contains each item created within the system.
Every non-user item must exist in this Group or it may become inaccessible.
Users may be removed from the All Group once they have been placed into at least
one other Group or if their statuses have been changed to 'hidden'. To facilitate
these requirements, modification of the All Group has been limited by default.
Without making a change to the System Settings, only users may be removed from
the All Group. It is highly recommended that only users be removed from the
All Group. All other changes to the All Group should be avoided.
Creating and Managing a Group
To create a new Group, click the Create button on the main Groups screen located
under Management-->Groups. This will direct you to the Group Creation screen
where you can specify the name and description of the Group (see figure 17.2).

Figure 17.2.Group creation
Once saved, select the newly created Group from the main Groups screen (see
figure 17.1). This will take you to the Groups Management Screen (see figure
17.3). Here you will select the items that are to belong to the Group along
with the users that will have access to these items. In other words, assigned
users will be able to log time, expense, and custom entries against the assigned items
as these items will be displayed in dropdowns within their timesheets, expense
sheets, and custom entry sheets. For each item displayed, the listbox to the left
contains the available items and the listbox to the right contains the items
that have been assigned to the Group. You can use the ctrl-click and shift-click
functionality to select multiple items. Once you have selected the items to
assign to the Group from the left listboxes, click the Save button. Upon refresh,
you will see that the items you selected are now in the listboxes to the right.
Note that if you have set up projects with dependencies, you need to make sure
that you include at least one valid item for each entry field for the projects
included in the Group. Otherwise, the users in the group may be unable to log
time, expense, or custom entries to the project.
On the Group creation screen, you also have the ability to copy the attributes of another group
by searching for and selecting the group and then clicking the Load button located in the top
right corner (see figure 17.2). This will prepopulate that group's selections which you can use
as a template of sorts. After clicking the Load button, you can modify the selections that will
be unique to the new group.
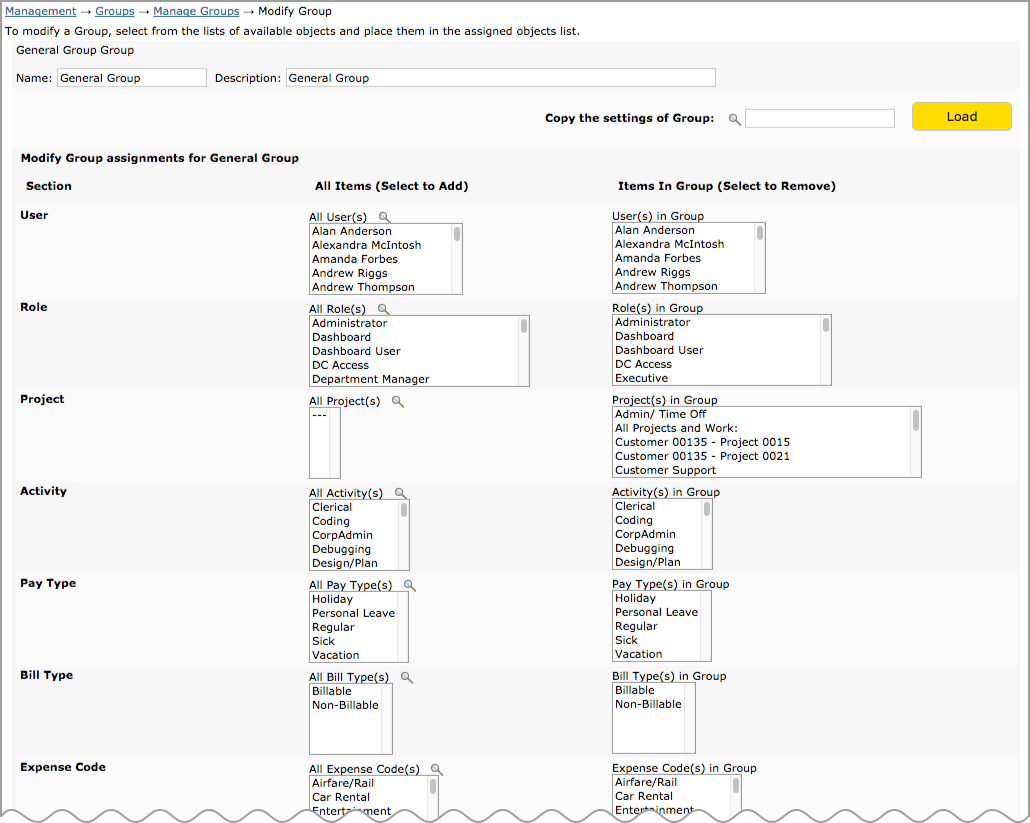
Figure 17.3.Group modification
To modify an existing Group, specify the search criteria in the main Groups
screen (see figure 17.1). You can search by Group name, description and type. If a Group is
created manually under Group Management or via Group Imports, it is labeled "Normal". If a Group
is created automatically via the Journyx Projectlink integration for MS Project, it is labeled
as a "Projectlink" type Group. If a Group is created automatically via the Organization Chart
Reader, it is labeled as a "System Created" type Group.
If a Group is created automatically as a
result of an assignment to a scheduled project/task, it is labeled as an "Assignment" type
Group. Assignment Groups are created automatically when users are assigned to scheduled
projects/tasks and ensure they have access to their assignments for review and time/expense
entry.
When
finished specifying the search criteria, click the Search button. The search
results will be displayed below the criteria. From the search results, click
the Group name. This will direct you to the Group Management screen where you
can select the users and items to assign to the Group (see figure 17.3). Alternatively,
you can select the category that you want to manage for the Group by selecting
it from the respective Modify column from within the search results (see figure
17.1). When finished making modifications, click the Save button.
To delete a Group, select the Group from the main Groups screen and click the
Delete Group button (see figure 17.1). Remember that if a user has been removed
from the All Group and does not exist in at least one other Group, that user
will be changed to 'hidden' status and will not be able to login until he/she
is returned to 'active' status under Management->User Management. Therefore,
if you will be deleting a Group, please ensure that users in that Group still
requiring system access are reassigned to another Group beforehand. Also, keep
in mind that access to every item is controlled through the Group structure.
If you delete the only Group that contains a particular item without first putting
that item into another Group that your Users can access, that item will be inaccessible
to everyone who might still need access to it.